
Use the Main Hall district names to separate your next objective from optional collection cleanup. The early Isaac encounter is at Castle Drawbridge; the Artist investigation points toward Brauner’s Atelier; and Mirror Rooms is a different district from the separate Hall of Mirrors area. Use the room connections on the map and the destination tables below before retracing a long route.
This page is a regional reference built from the Main Hall map and location index. It identifies recorded destinations and pickups; it does not claim that every connecting door is open on your first visit.
Read the Main Hall map

Match room outlines and checkpoint markers with the in-game map. Dotted lines connect background doors.
Open the full-size Main Hall map.
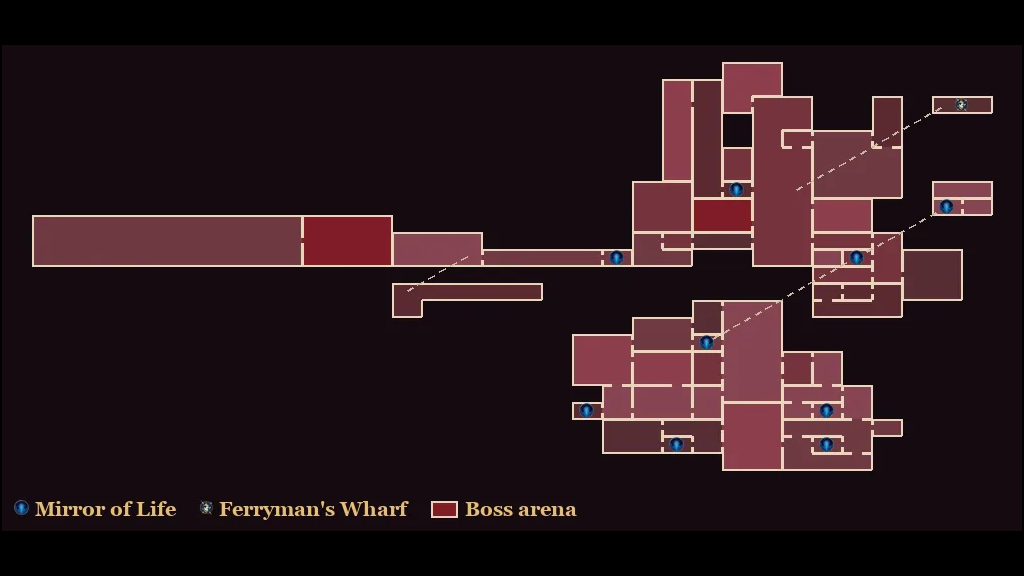
The source map uses one square per screen, different colours for districts, and red boss arenas. Gaps in the outlines are doorways. Dotted connections identify background doors and the interiors behind them. A room that looks adjacent on the map is therefore not necessarily reached by walking through the nearest side wall.
The static map above has no written district labels. Match its room outlines and travel markers to your in-game map, then use the district names in the tables below to identify your destination. Main Hall contains sections such as the Entrance Corridor, Waterworks, Archives and Gallery of Eternal Night; do not treat the entire region as one room.
Choose the branch that matches your objective
| Your objective | District or landmark to identify | What to do with that information |
|---|---|---|
| Identify the early Isaac encounter | Castle Drawbridge | Keep this encounter separate from the later Clock Tower fight. |
| Follow the Artist investigation | Elevator Tower, Old Gallery and Brauner’s Atelier | Read the investigation clues and follow the dedicated Artist route rather than searching every optional chamber. |
| Check the Notre-Dame painting lead | Gallery of Eternal Night | Use the existing painting guide to check its conditions. Finding the painting alone does not establish that it is ready to open. |
| Follow the Library lead | Brauner’s Atelier | The regional index places the “Carmilla in the Library” clue here; the Library guide handles its globe puzzles and onward climb. |
| Find Eleanor’s Main Hall location | Mirror Rooms | Use the district label to orient yourself; the Hall of Mirrors rescue is a separate task. |
| Follow the Builder lead | Abandoned Workshop | The indexed clue points toward the Clock Tower; it is not a claim that the Builder fight takes place in this workshop. |
The clue locations above come from the regional item and clue table. They are navigation anchors, not an instruction to complete every investigation in that table in the displayed order.
Keep the two Isaac encounters separate
The Main Hall index lists the first Isaac fight at Castle Drawbridge. A later Isaac battle belongs to the Clock Tower. If you are looking for the later encounter, repeatedly searching the Drawbridge will not put you in that later arena.
For the encounter distinction and the castle approach, continue with Dracula’s Castle entrance.
Keep the painting route on its own page
Gallery of Eternal Night contains the Notre-Dame painting lead, while the Artist investigation includes clues in other Main Hall districts. A clue location, an investigation objective and an actual opened passage are different milestones.
Use the Notre-Dame painting and entrance guide to check the specific opening requirements before trying the passage.
Use the checkpoint districts to resume exploration
The regional index records Mirrors of Life in these Main Hall districts:
- Entrance Corridor
- Ballrooms
- Elevator Tower
- Archives
- Servants’ Quarters
- Boudoirs
- Waterworks
- Torture Chambers
- Storerooms
Treat these as district-level checkpoint references. They are not coordinates or a guarantee that you can cross every intervening passage with your current abilities. If you return through a familiar Mirror, first locate its district on the map, then trace the route to your present objective.
Main Hall also has a Ferryman’s Wharf in the source location index; the table does not assign it a district name. For how the two travel systems work, use Mirrors of Life and Ferryman locations.
Check named districts when returning for equipment
If your immediate objective is an item rather than the next area, use the district as the search anchor. The recorded locations include:
| Pickup | Main Hall district |
|---|---|
| Alucard’s Sword and Shield | Alucard’s Tower |
| Jewel Knuckles | Old Gallery |
| Morning Star | Inner Courtyard |
| Rapiers | Watch Tower |
| Blood Vial | Archives |
| Cursed Coin | Wine Cellar |
| Witch’s Knot | West Hall |
These entries identify where the source lists the pickup, not the moves or key items required to reach every ledge. A pickup name in the table is not evidence that its route is already available in your save. The regional source also lists other Relics and stat collectibles; this shorter table is intended for finding a named destination, not for certifying a 100% clear.
Continue with the relevant route
- Dracula’s Castle entrance — the approach and early Isaac encounter.
- Notre-Dame painting route — opening the painting and reaching the cathedral.
- Overall map and progression route — choose the next regional objective.
- Mirrors of Life — checkpoint and mirror-travel guidance.